Introduction
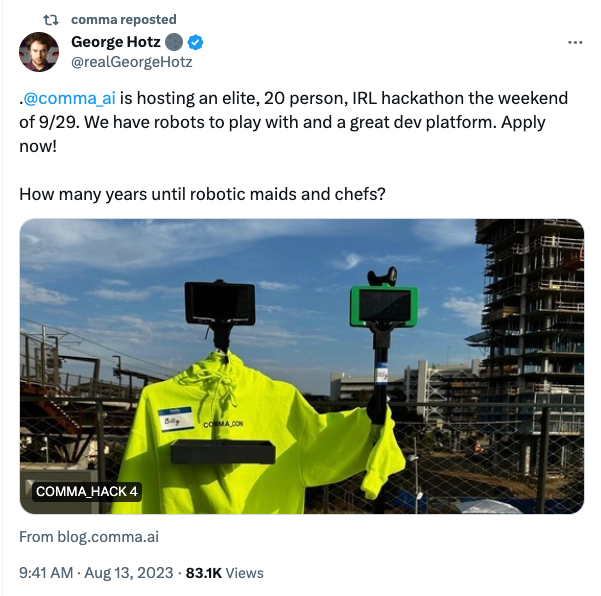
One afternoon, I was scrolling through Twitter and saw a tweet from Comma AI about an invite-only hackathon. The hackathon was focused on building a self-driving robot in a weekend. Having tackled several computer vision projects, I was excited to apply my skills to the self-driving domain. Intrigued by the challenge, I decided to sign up and see if I'd get selected.
Accepted to the Hackathon

And then, one day, I got in.
Now playing: Tron Legacy: The Grid
I received an email from Comma AI inviting me to the hackathon. I was excited to be one of the applicants picked to participate in the hackathon.
Team Formation
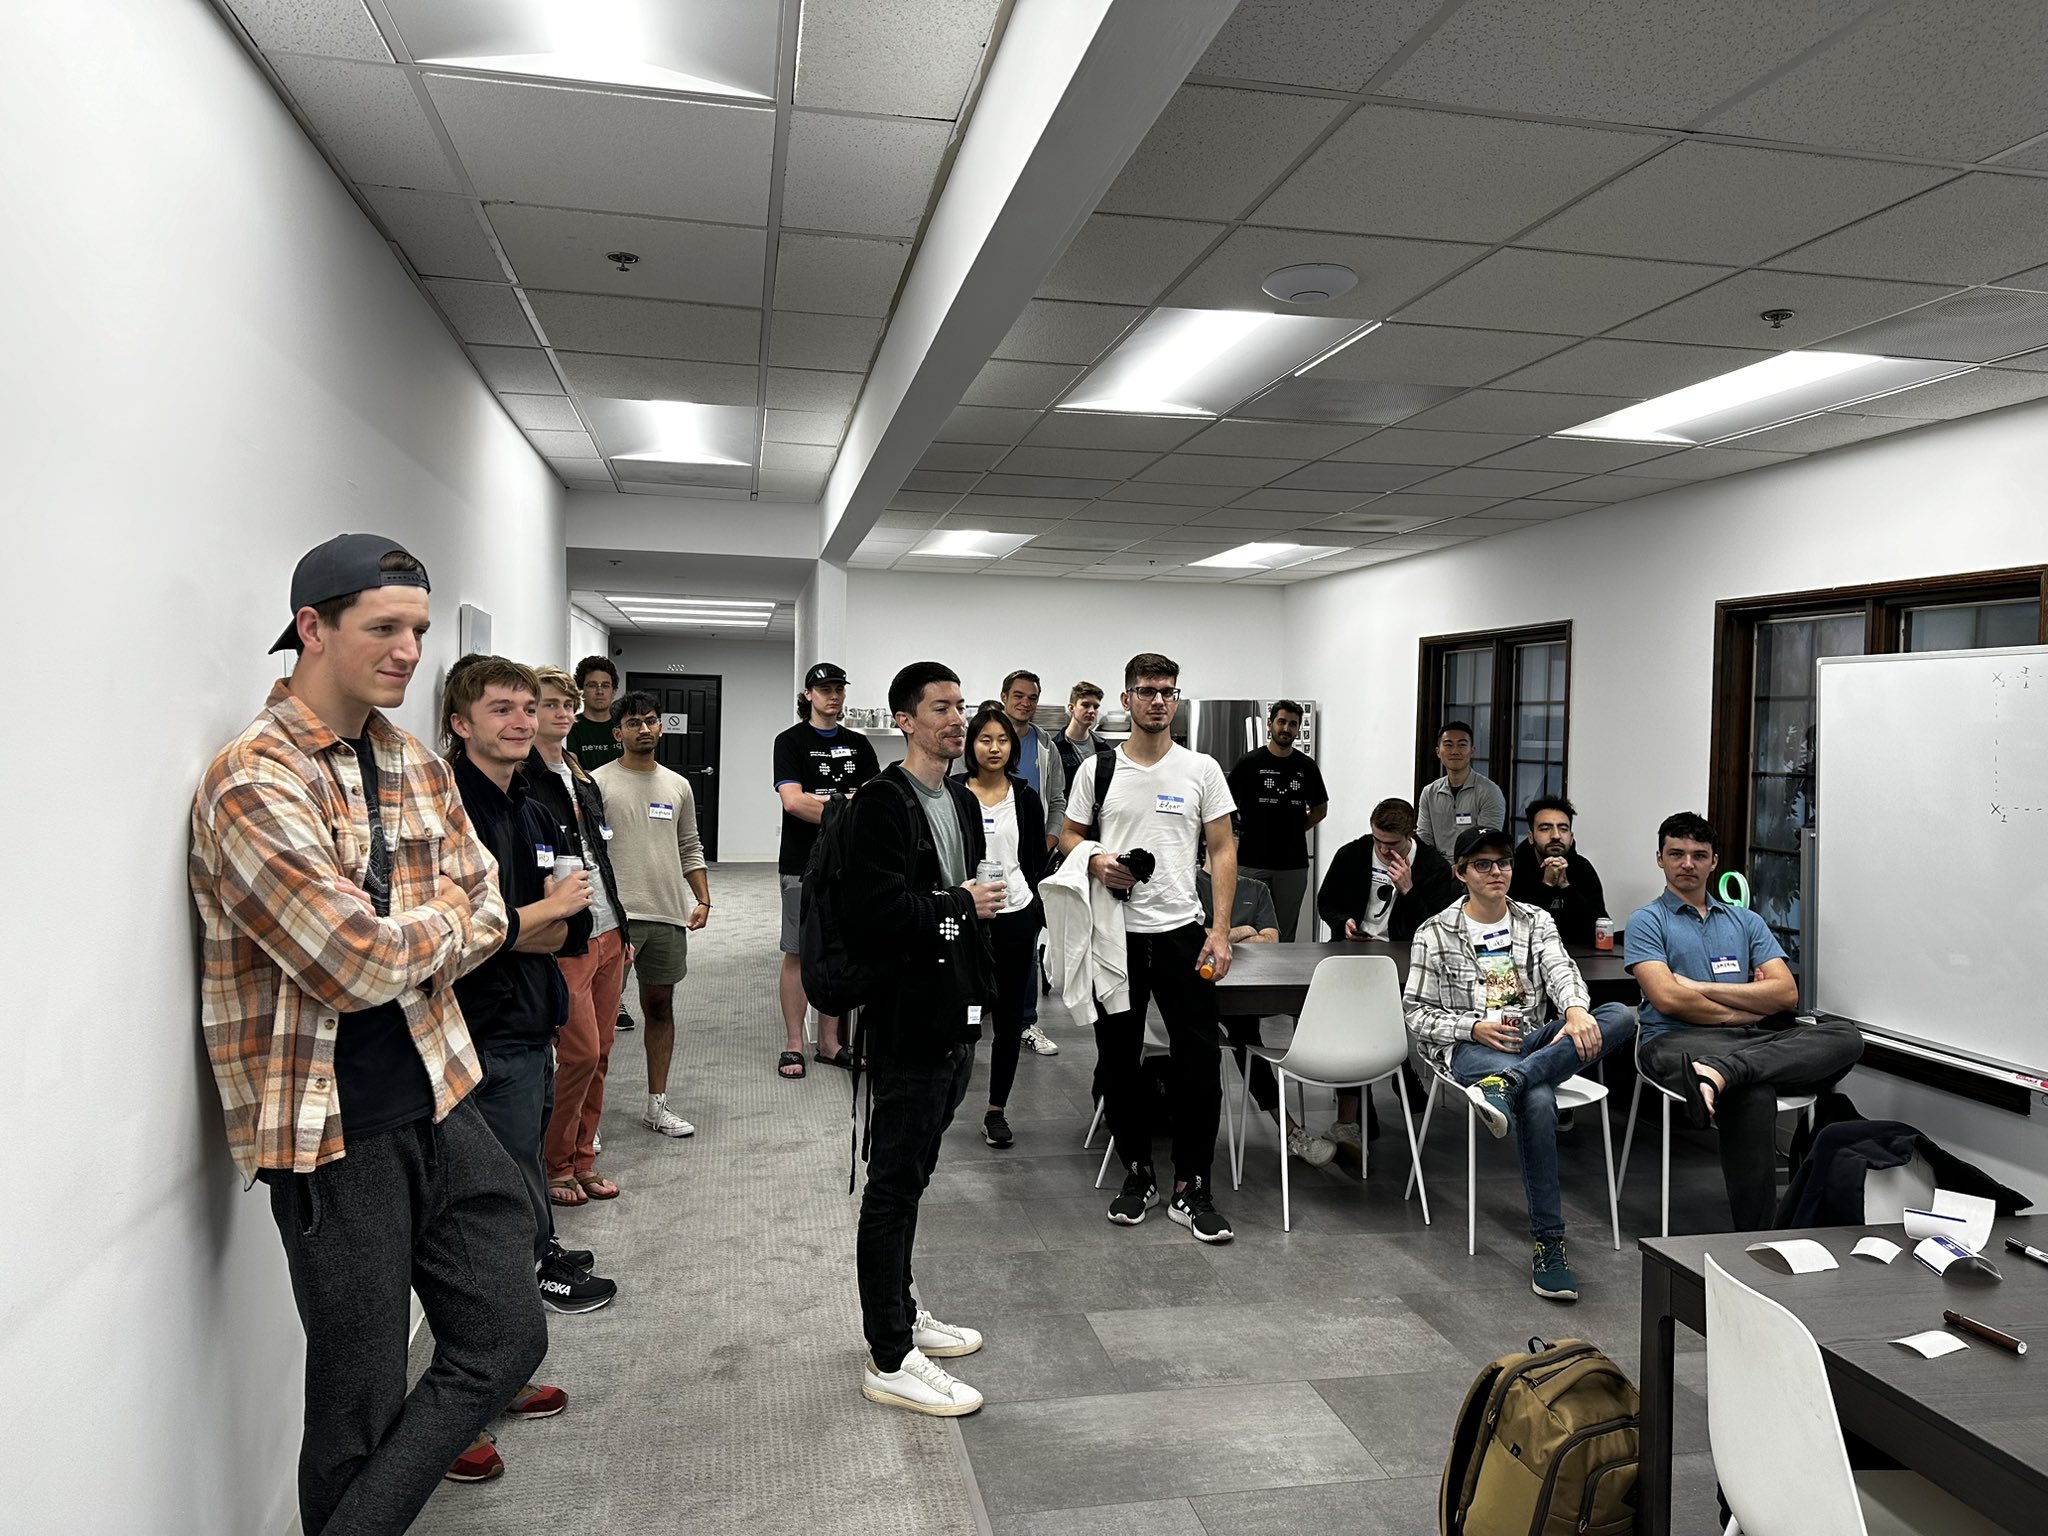
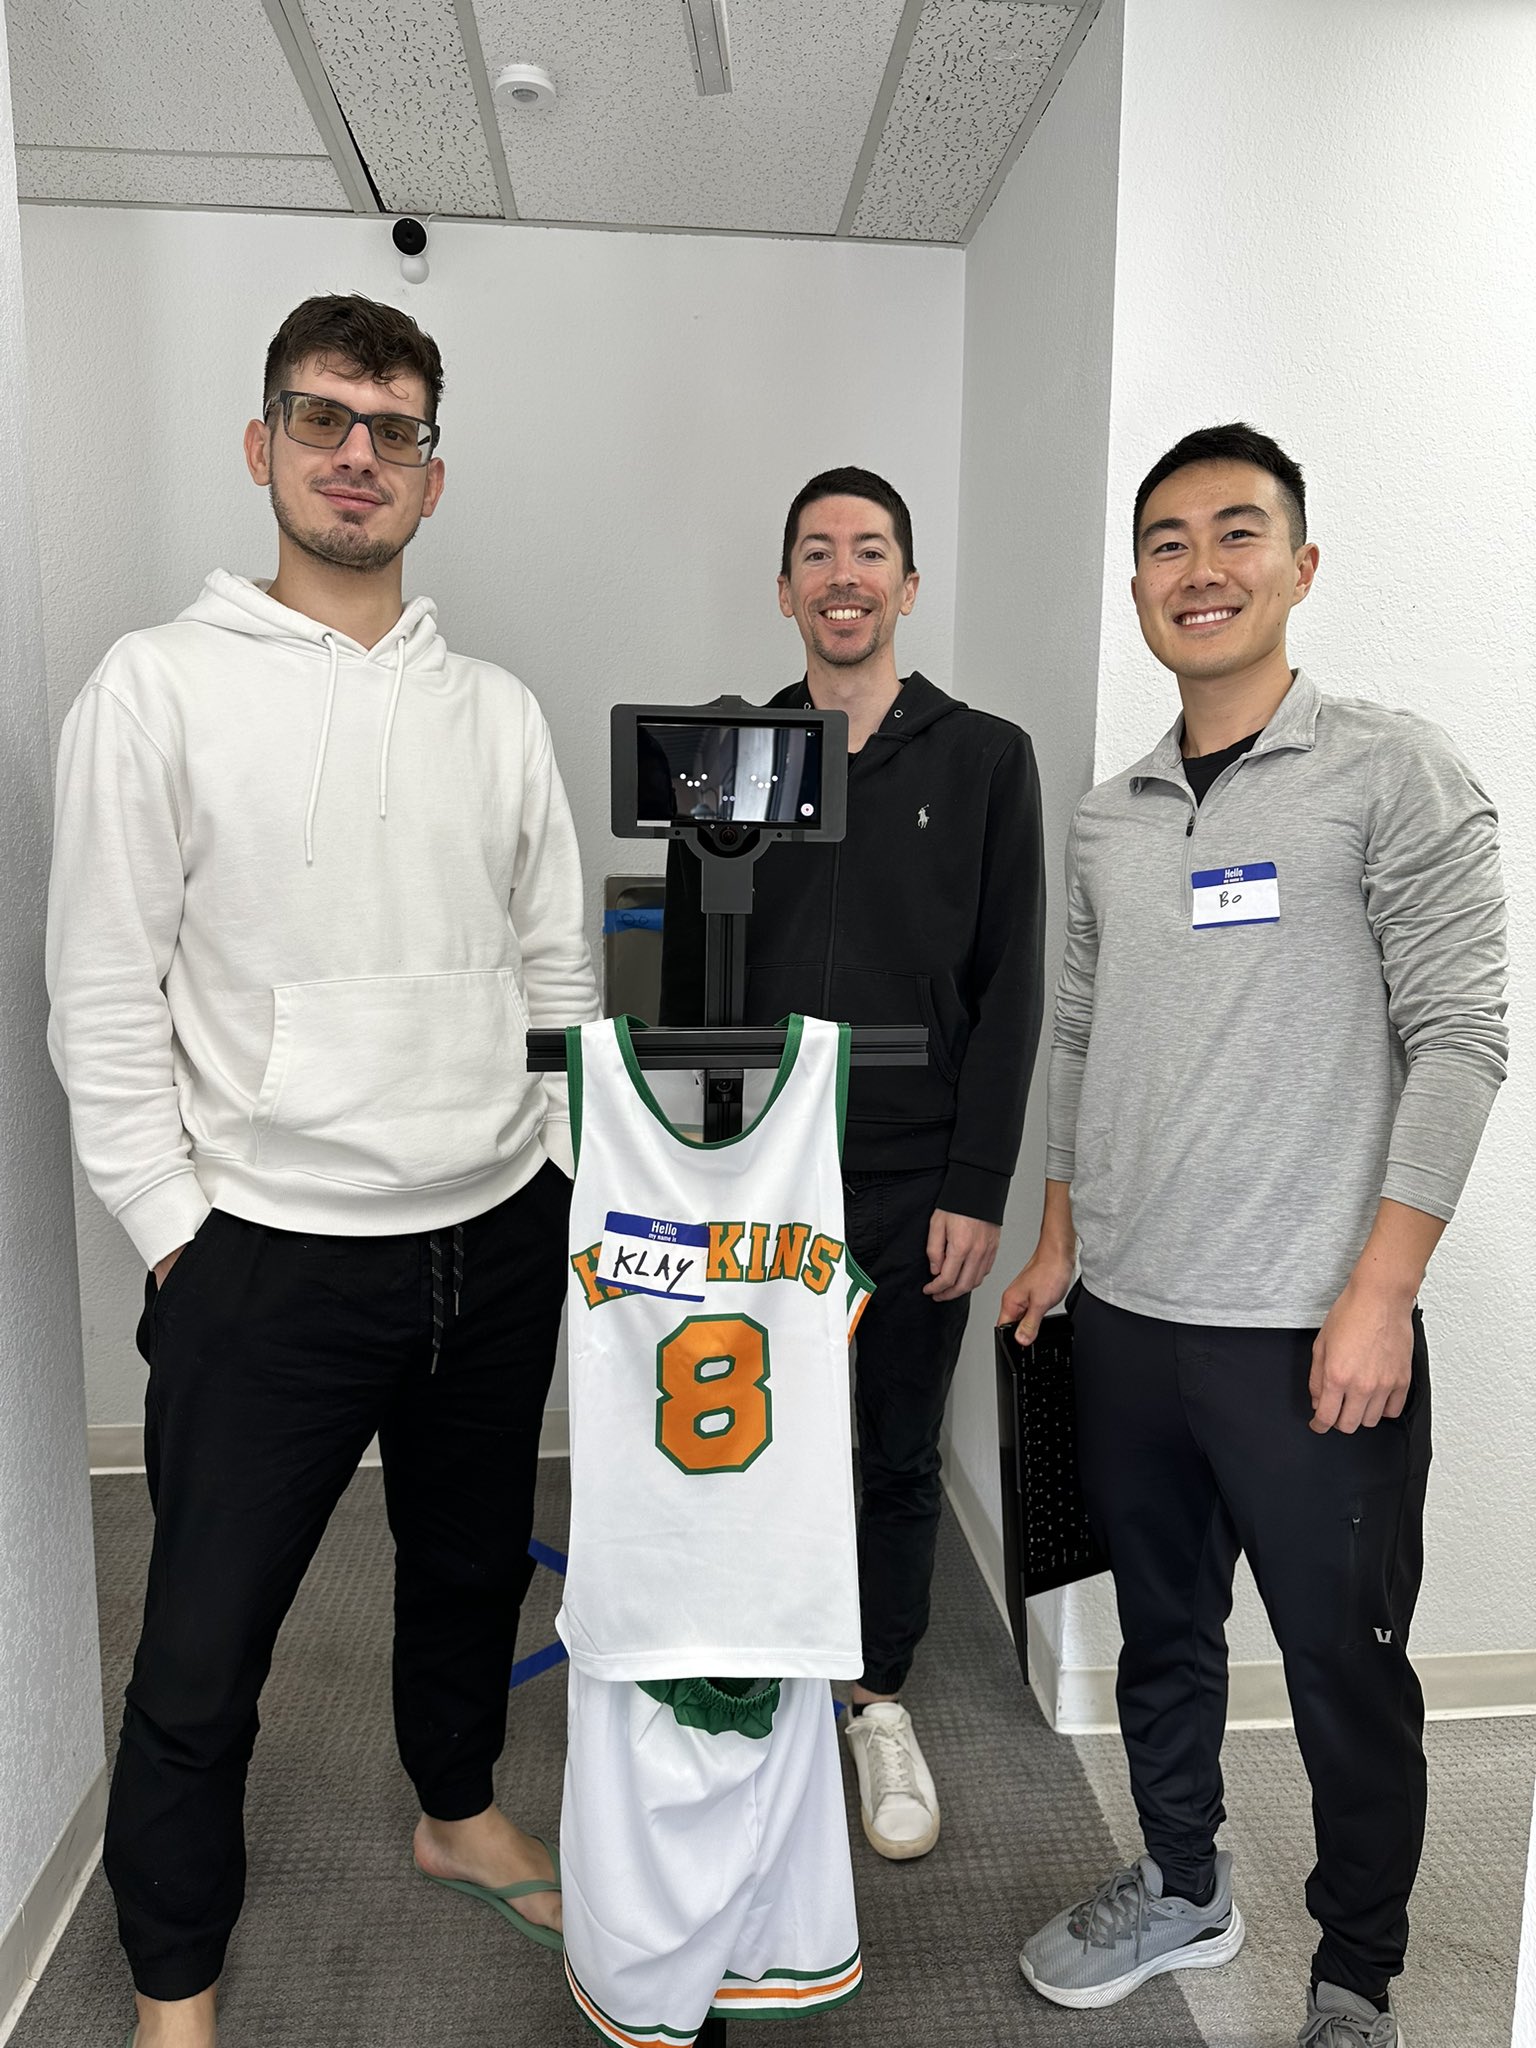
With 20 attendees, we were split into teams of 2-3 people. I had previously met one of the attendees, Bo, so we decided to team up. Edgar, a PHD student from New York, became our third, completing our team.
Next, we needed to pick out our robot.
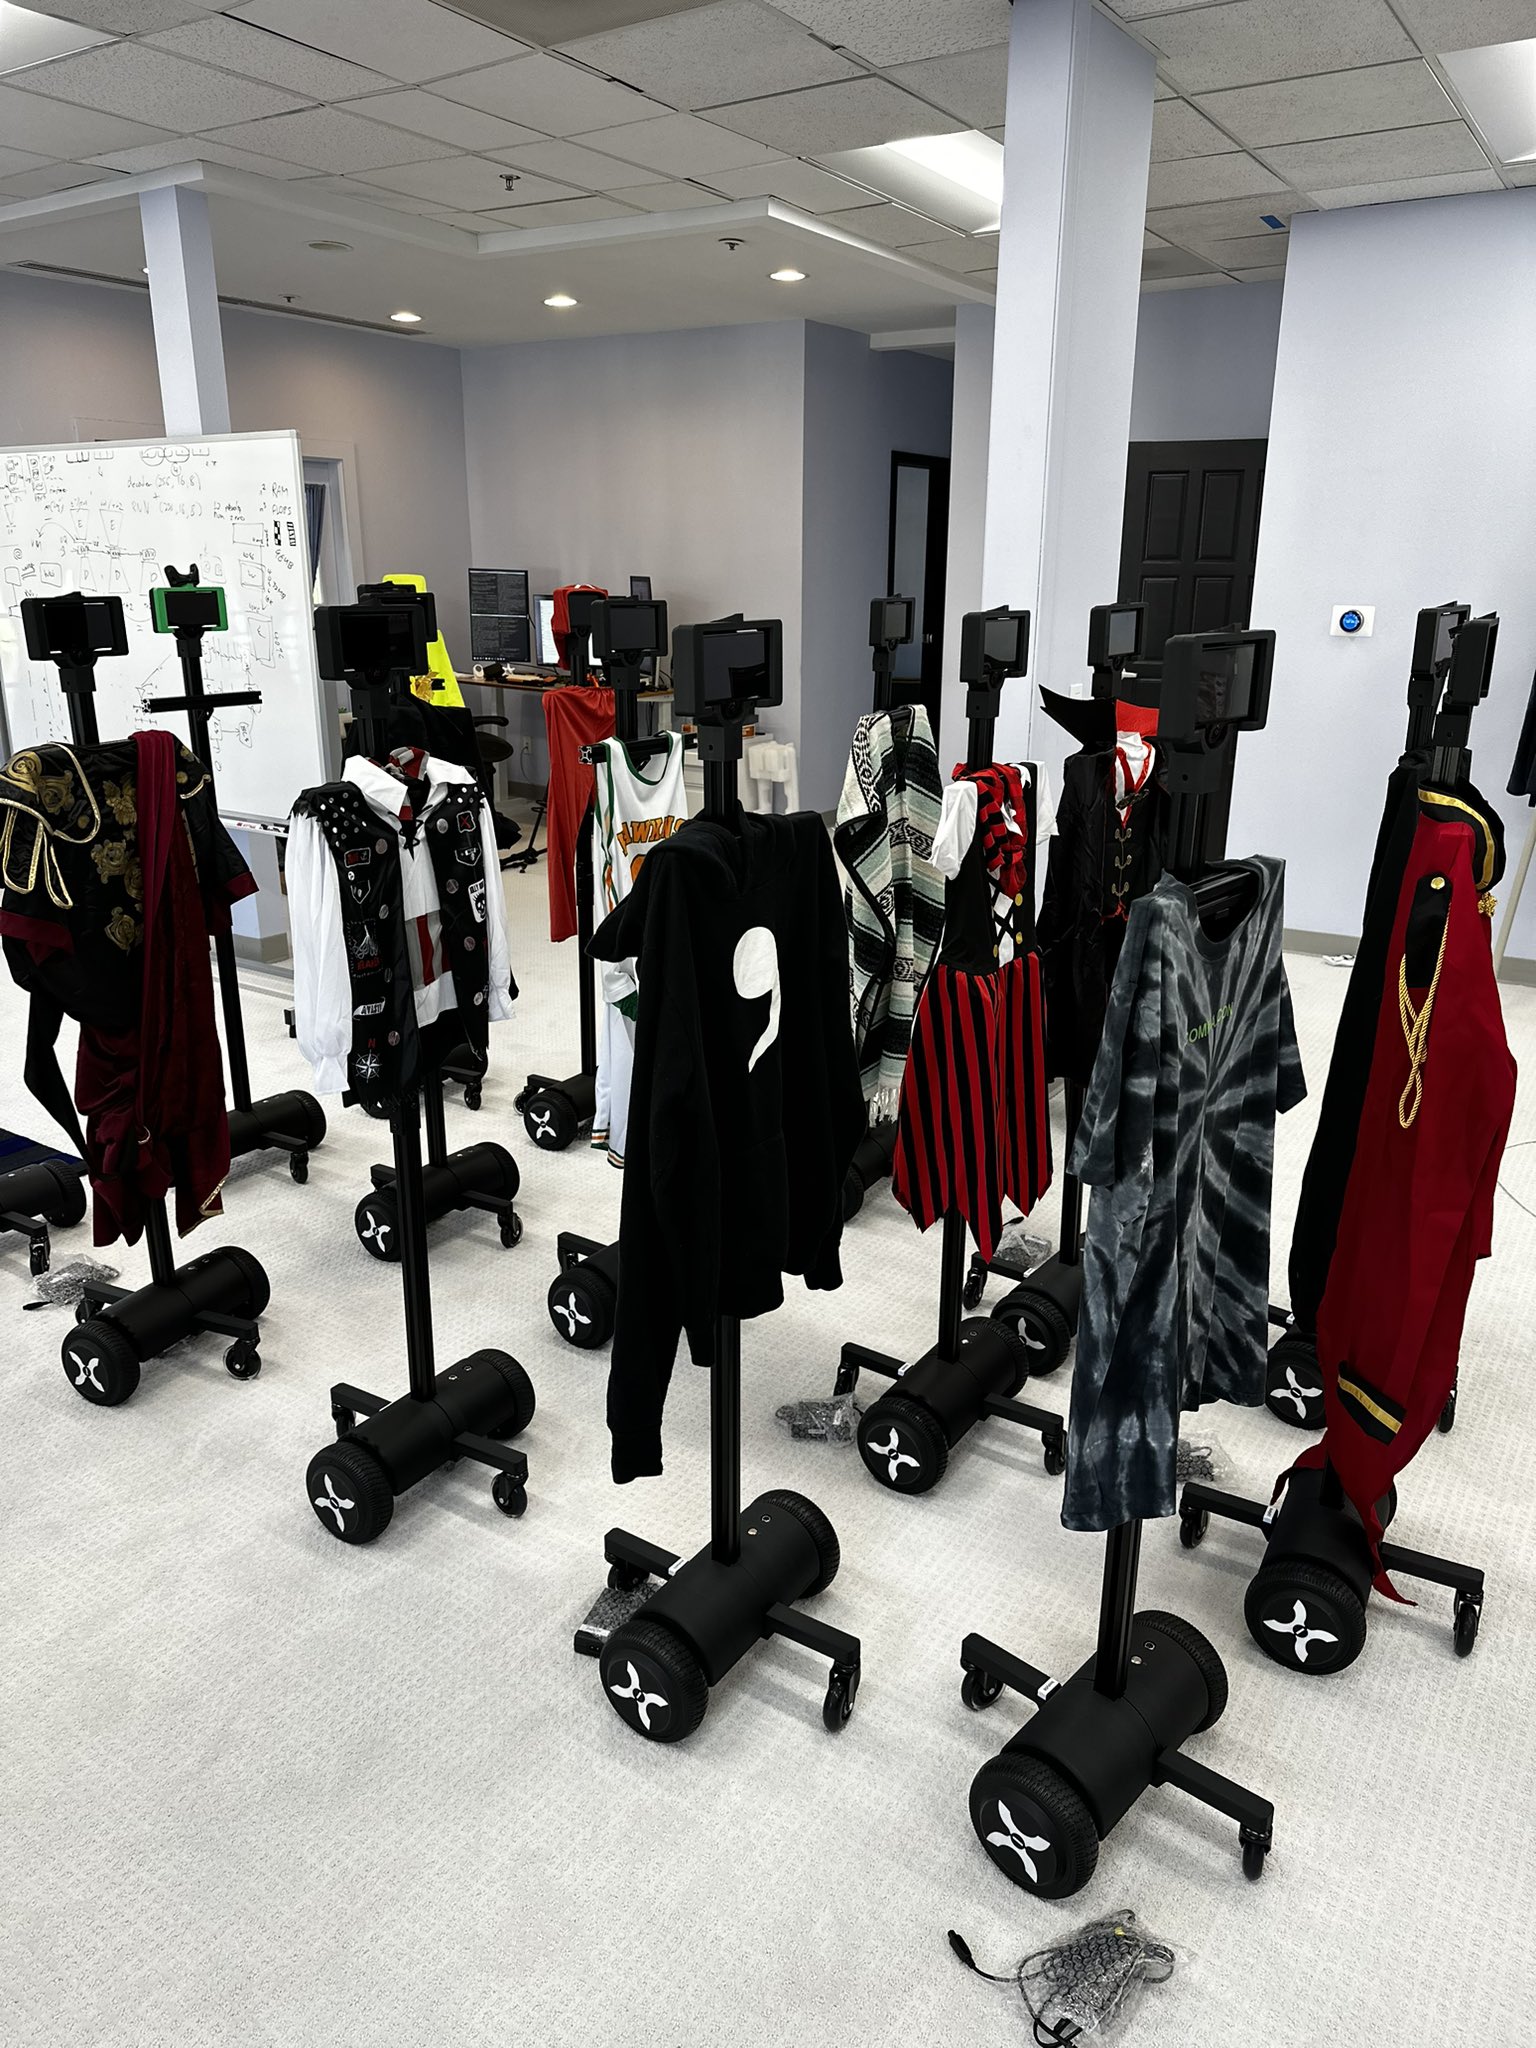
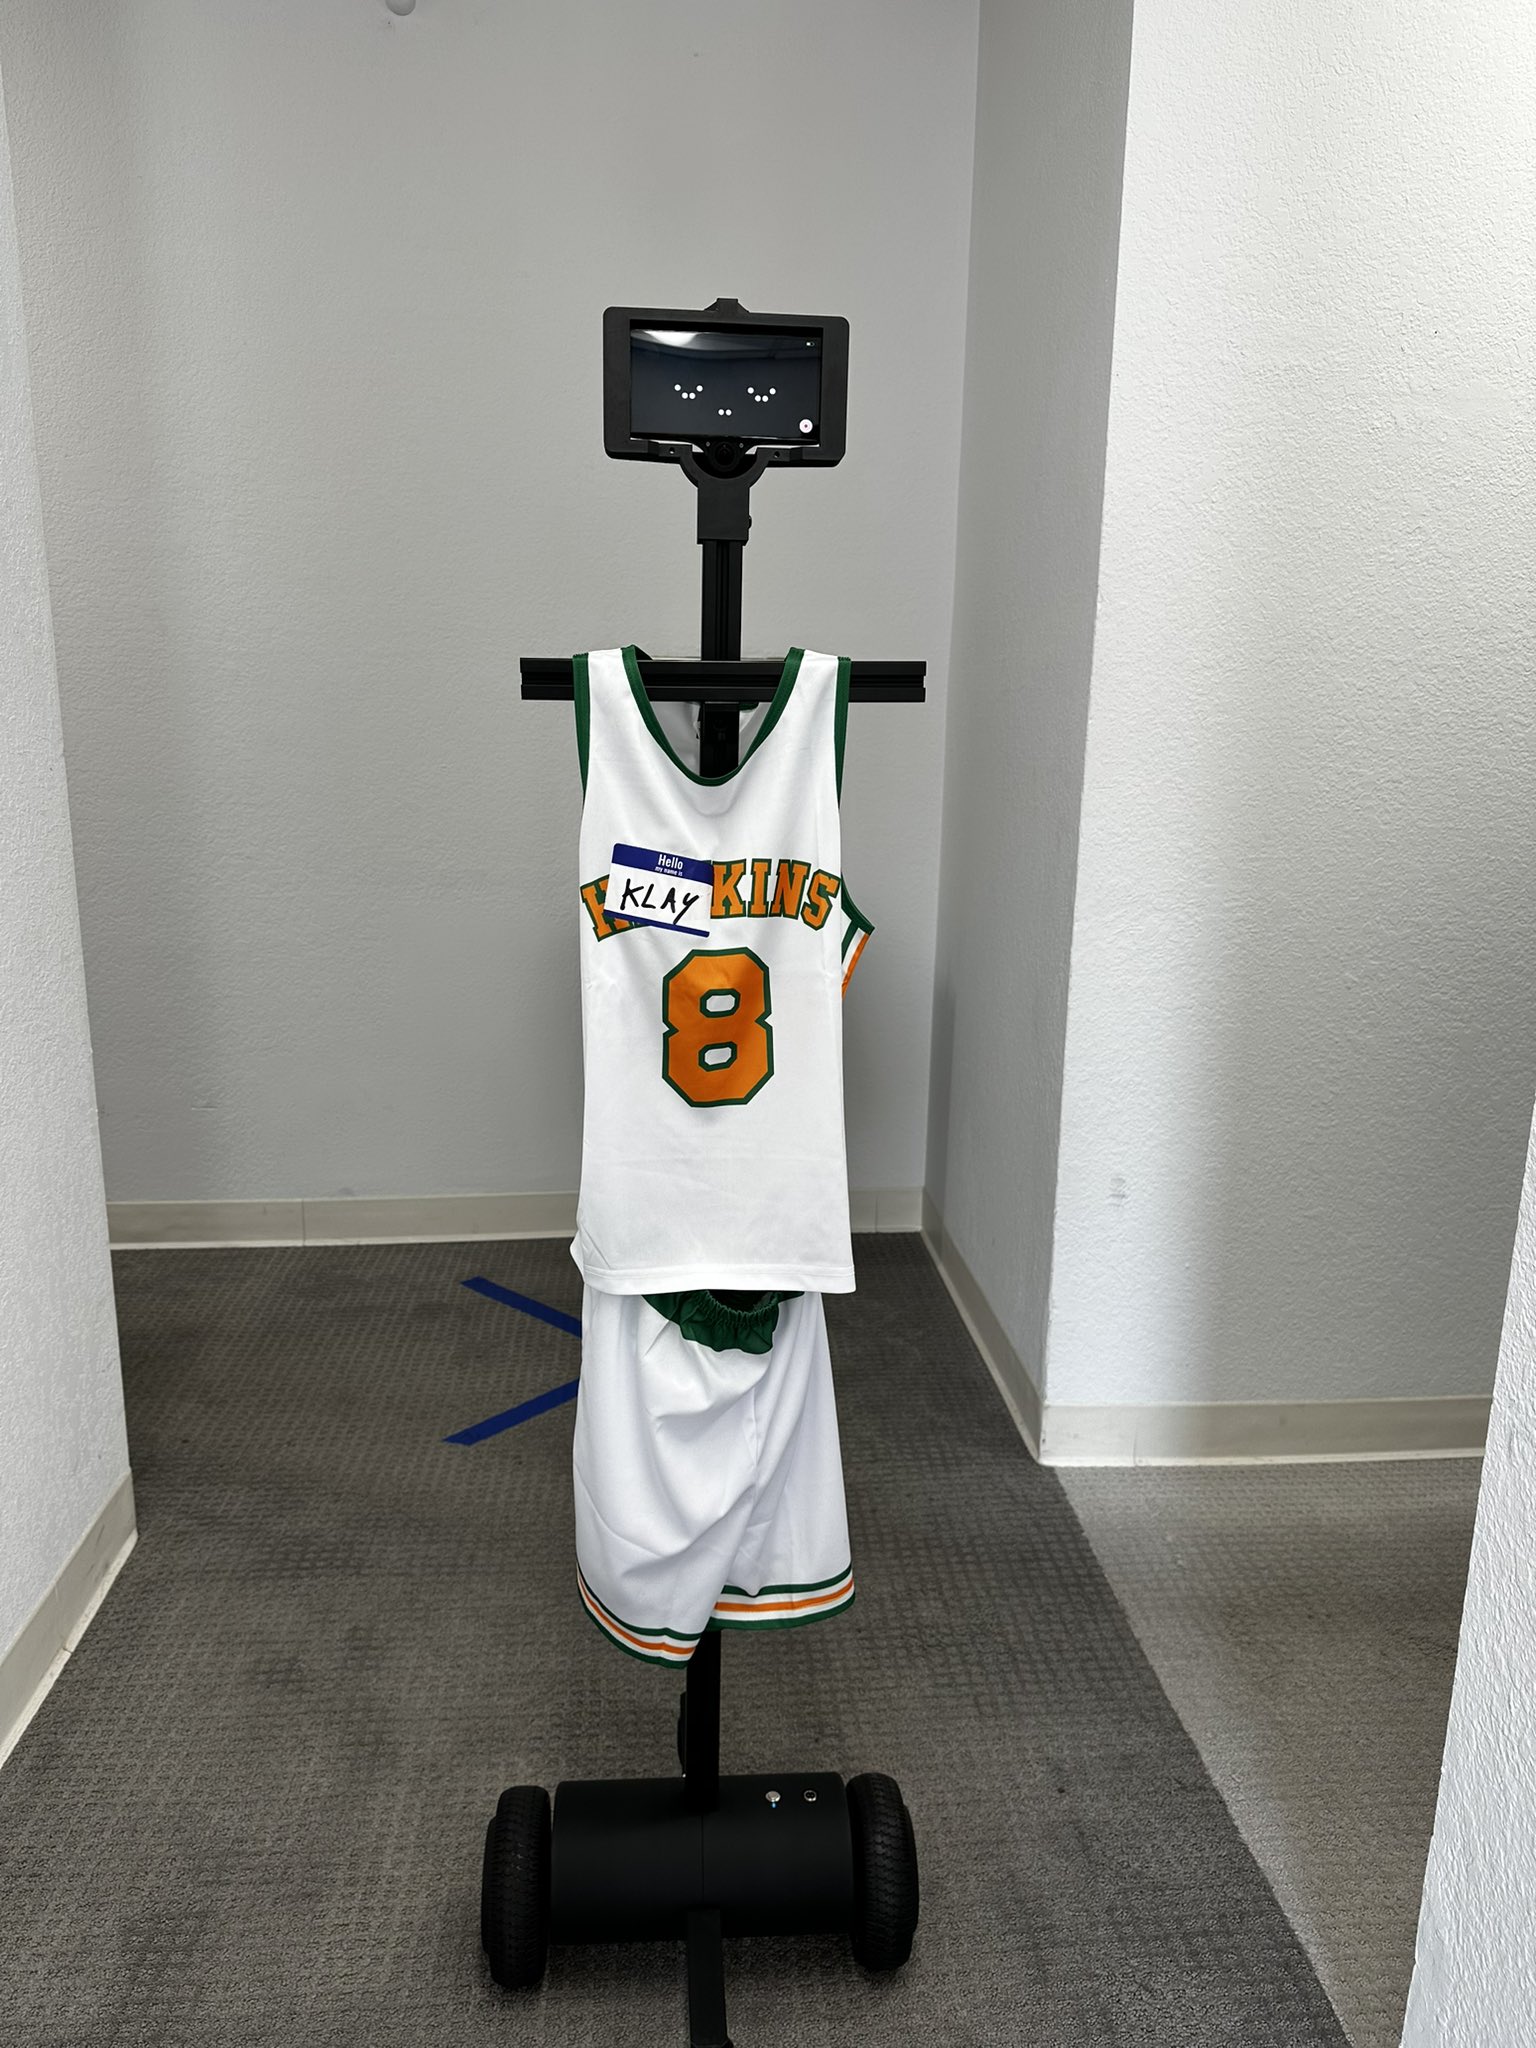
We had a few options to choose from, but we decided to go with the Klay for his superior ability to dunk on the competition.
Brainstorming and Concept Development
With the team picked out, our robot enlisted, we were ready to get started.
As with any new project, it's helpful to get your bearings on what you're trying to accomplish and how the available resources can help you get there. We started learning how to use the robot's API and what sensors were available to us.
- How is the robot controlled?
- What sensors are available?
- How do we get the video feed?
Robot Overview
The robot is a comma 3x, mounted to a comma body The 3x provides front and back cameras, as well as compute to run the robot. The body provides the power and the ability to drive the robot around, with 2 motors driving the wheels
Initial Cheese Strategy
The goal of the hackathon was to build a self-driving robot that could navigate the comma office, completely autonomously. As part of this, there was a prize for who could reach the initial checkpoint first, which was a straight shot down the hallway. We decided to go for this prize first, so we could get some points on the board while getting familiar with the robot.
Our initial idea was to drive the robot down the course manually, record all the inputs, and then replay them back to the robot. This would allow us to get the robot to the end of the course quickly, and then we could focus on the autonomous part of the challenge.
How hard could it be?
Total Failure
We started by recording the inputs from the controller and then replaying them back to the robot. This did not work as expected. The robot would drive in a straight line for a few seconds, and then it would start to drift off course. We tried to adjust the inputs to get the robot to drive straight, but we were not able to get it to work.
The primary issue was the frequency at commands were fed while we drove the robot was drastically different from the frequency at which we were replaying the commands.
It was time to go back to the drawing board.
Designing the Self-Driving Robot
With our cheese strategy out of the way, we could focus on the main challenge: building a self-driving robot. We discussed a few different approaches to the problem: SLAM, object segmentation for feature maps, reinforcement learning, but ultimately, we decided to go with a simple approach that would allow us to get a working.
Framing the problem
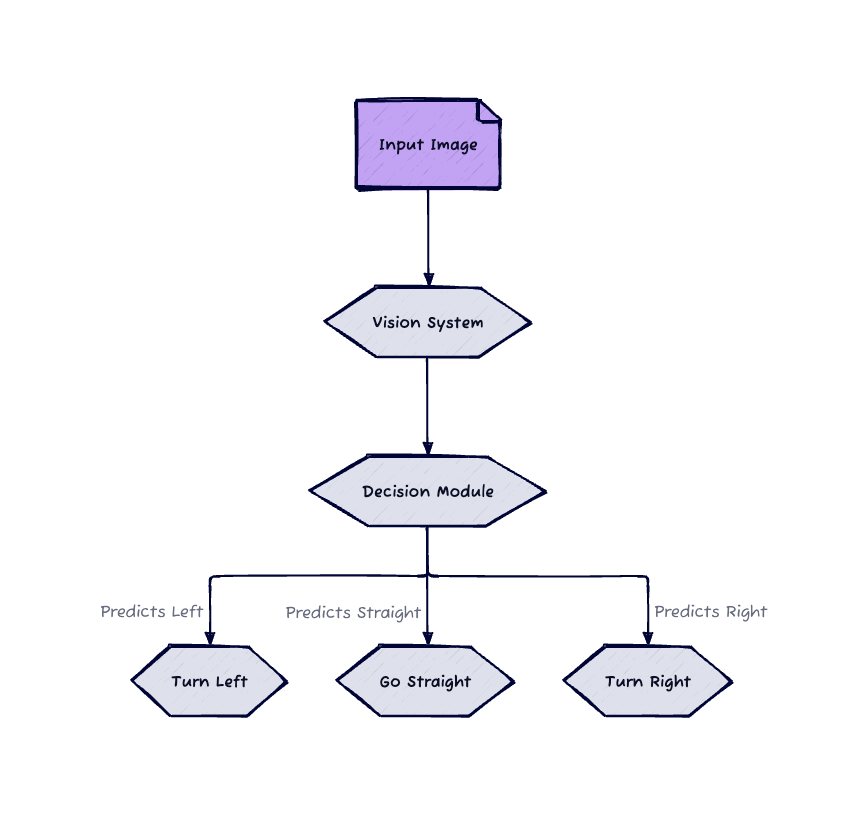
We framed the problem as a simple image classification problem:
Given an image, what is the best action to take? left, right, or straight.
After evaluating several models, we chose EfficientNet B0 for its balance of efficiency and accuracy, making it suitable for on-device execution.
Collecting Data
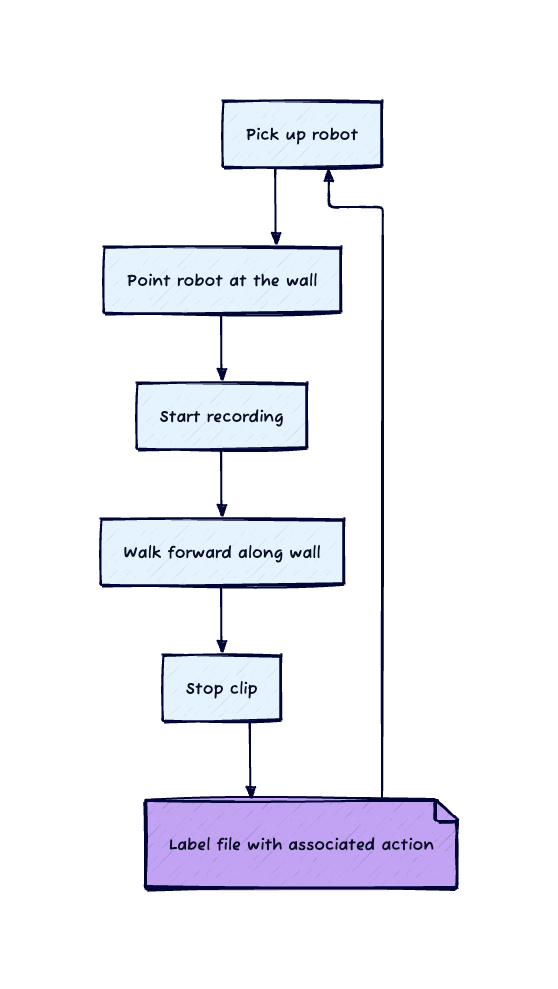
 Walk along the hallway, pointing the camera at the wall, and record the images, label all as a left action
We needed to collect data to train our model. We decided to use the robot's camera to collect data as we drove the robot around the office. The naive approach would be to drive the robot around the office and record the images and the corresponding actions. However, this would require us to manually label the images, which would be time-consuming and error-prone.
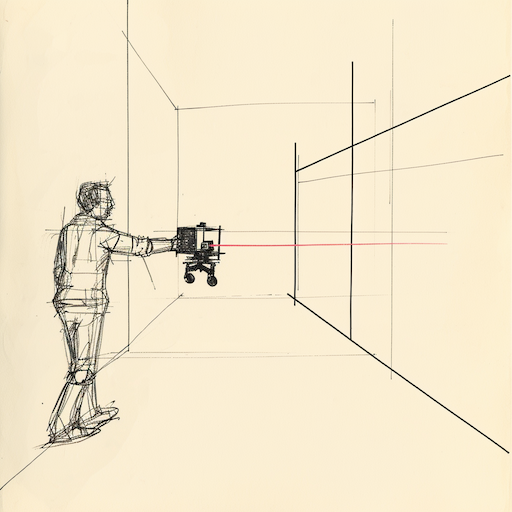
Instead, I came up with a clever trick to accelerate collection and labeling the images. We would carry the robot around the office and create recordings consisting of only one action: left, right, or straight. As all the actions would be the same for the clip, this would allow us to label a large amount of data quickly.
Aside: The robot is pretty heavy, so you have to do this awkward humorous waddle to carry it around.
10 mins of walking around the office and 9000 images later, we were ready for to begin training.
Training the Model
For training the model, we used PyTorch, a popular deep learning framework. We used a pre-trained EfficientNet B0 model and fine-tuned it on our data. I personally was not super familiar PyTorch, but fear not I had chatGPT on my side. With some prompting magic, I was able to get some training loop code and shortly after, we were ready to test!
import pandas as pd
from sklearn.model_selection import train_test_split

# Load the dataset
data = pd.read_csv("ds_info.csv")

# Splitting the data into train, validation, and test with stratification
train, temp = train_test_split(data, test_size=0.3, random_state=42, stratify=data['label'])
val, test = train_test_split(temp, test_size=0.5, random_state=42, stratify=temp['label'])

# Save them into separate CSV files
train.to_csv("train_dataset.csv", index=False)
val.to_csv("val_dataset.csv", index=False)
test.to_csv("test_dataset.csv", index=False)

print(f"Total data: {len(data)}")
print(f"Training data: {len(train)}")
print(f"Validation data: {len(val)}")
print(f"Test data: {len(test)}")
# 1. Import necessary libraries
import torch
import torch.nn as nn
import torch.optim as optim
import pandas as pd
from torchvision import models, transforms
from torch.utils.data import Dataset, DataLoader
from PIL import Image
# 2. Define the dataset class
class SelfDrivingDataset(Dataset):
def __init__(self, csv_file, transform=None):
self.dataframe = pd.read_csv(csv_file)
self.transform = transform
self.label_map = {'F': 0, 'R': 1, 'L': 2 }
def __len__(self):
return len(self.dataframe)
def __getitem__(self, idx):
img_name = self.dataframe.iloc[idx, 0]
image = Image.open(img_name)
# Convert grayscale to RGB
if image.mode != 'RGB':
image = image.convert('RGB')
label_str = self.dataframe.iloc[idx, 1]
label = torch.tensor(self.label_map[label_str], dtype=torch.long)
if self.transform:
image = self.transform(image)
return image, label
transform = transforms.Compose([
transforms.Resize((240, 240)), # Adjust based on the exact variant
transforms.ToTensor(),
transforms.Normalize(mean=[0.485, 0.456, 0.406], std=[0.229, 0.224, 0.225]) # You might need to adjust these values
])
train_dataset = SelfDrivingDataset(csv_file="train_dataset.csv", transform=transform)
train_loader = DataLoader(train_dataset, batch_size=32, shuffle=True)
val_dataset = SelfDrivingDataset(csv_file="val_dataset.csv", transform=transform)
val_loader = DataLoader(val_dataset, batch_size=32, shuffle=False)
# 4. Load the pre-trained model and modify the last layer
model = models.efficientnet_b0(pretrained=True)
num_features = model.classifier[-1].in_features
print(num_features)
model.classifier[-1] = nn.Linear(num_features, 3)
for param in model.parameters():
param.requires_grad = False
for param in model.classifier.parameters():
param.requires_grad = True
device = torch.device("cuda:0" if torch.cuda.is_available() else "cpu")
model = model.to(device)
# 5. Define the training and validation functions
criterion = nn.CrossEntropyLoss()
optimizer = optim.Adam(model.parameters(), lr=0.001)
def train_epoch(model, loader, criterion, optimizer, device):
model.train()
total_loss = 0.0
corrects = 0
for inputs, labels in loader:
inputs, labels = inputs.to(device), labels.to(device)
optimizer.zero_grad()
outputs = model(inputs)
loss = criterion(outputs, labels)
loss.backward()
optimizer.step()
total_loss += loss.item() * inputs.size(0)
_, preds = torch.max(outputs, 1)
corrects += torch.sum(preds == labels.data)
return total_loss / len(loader.dataset), corrects.double() / len(loader.dataset)
def validate(model, loader, criterion, device):
model.eval()
total_loss = 0.0
corrects = 0
with torch.no_grad():
for inputs, labels in loader:
inputs, labels = inputs.to(device), labels.to(device)
outputs = model(inputs)
loss = criterion(outputs, labels)
total_loss += loss.item() * inputs.size(0)
_, preds = torch.max(outputs, 1)
corrects += torch.sum(preds == labels.data)
return total_loss / len(loader.dataset), corrects.double() / len(loader.dataset)
# 6. Train the model
num_epochs = 10
N = 5
best_val_acc = 0.0 # track the best validation accuracy
for epoch in range(num_epochs):
train_loss, train_acc = train_epoch(model, train_loader, criterion, optimizer, device)
val_loss, val_acc = validate(model, val_loader, criterion, device)
print(f"Epoch {epoch+1}/{num_epochs} - Train loss: {train_loss:.4f}, Train accuracy: {train_acc:.4f}, Validation loss: {val_loss:.4f}, Validation accuracy: {val_acc:.4f}")
# Checkpointing every N epochs and when there's an improvement
if (epoch + 1) % N == 0 or val_acc > best_val_acc:
if val_acc > best_val_acc:
best_val_acc = val_acc
checkpoint_name = f'model-checkpoint_epoch{epoch+1}_valacc{val_acc:.4f}.pth'
checkpoint = {
'epoch': epoch + 1,
'state_dict': model.state_dict(),
'optimizer': optimizer.state_dict(),
'best_val_acc': best_val_acc
}
torch.save(checkpoint, checkpoint_name)
print(f"Model checkpoint saved as {checkpoint_name}")
# 7. Save and load the trained model
torch.save(model.state_dict(), "self_driving_rc_model_efficient.pth")
model.load_state_dict(torch.load("self_driving_rc_model_efficient.pth"))Overcoming Challenges and Technical Hurdles
With our model tuned, we were ready to give the first checkpoint another shot. For simplicity, we opted to stream the video feed from the robot to our laptops and run the model inference on our laptops. This would allow us to quickly iterate on the model and test it out.
The robot performed well, until it didn't...
Network Failure
Due to the large number of people in the office, the network was not very stable. This introduced a potentially large latency between the robot and our laptops. Additionally, as the robot moved around the office, it would switch between access points, causing the robot to disconnect our SSH session.
Enter the Hotspot
To overcome this, we decided to run our own hotspot and connect the robot to it. This would allow us to have a stable connection between the robot and our laptops as we moved around the office.
With the hotspot setup, we were ready to give the first checkpoint another shot.
Train Inference Mismatch
We were able to get the robot to drive down the hallway, but its performance was not as expected. The robot would drive down the hallway, but it would drift off course and seemed a bit random in its actions.
We investigated further by visualizing the model's predictions on the video feed. We quickly noticed that the robot was not reacting to the video feed as we expected. It would drive straight when it should turn, and it would turn when it should drive straight. Our loss curve looked good, so we were confused as to why the model was not performing as expected.
We identified a mismatch in how we were preprocessing the images for training and inference. This was causing the model to see different images during training and inference, which was causing the model to perform poorly.
The Final Push: Programming and Testing
With the model working as expected, we were able to complete the first checkpoint. Seeing the robot not only drive down the hallway but also make the correct turns was a great feeling. We all had a sense of accomplishment and were ready to move to the collecting data on the next hallway.
At this point, we were running out of time, so we decided to focus on:
- Get the model running on device
- Implement a recovery mechanism for when the robot gets stuck
Hackathon Presentation and Results
The hackathon was coming to an end, and it was time to present our results. We were able to get the model running on the robot and implement a recovery mechanism for when the robot gets stuck.
The audience was visibly impressed during our presentation, particularly with the robot's ability to self-recover. Our robot ended his journey, encountering an out-of-distribution scenario, and ended in the gym, where he got stuck.
Robot self-recovering after getting stuck
Self driving through checkpoint 1
Full video presentation available hereOur robot was able to complete the first checkpoint and drive down the hallway. From there, the robot self-recovered its way through the second checkpoint and ultimately ended up stuck in the gym.
Reflections and Future Prospects
I enjoyed my time at the hackathon and learned a lot about building a self-driving robot. I was able to apply my computer vision knowledge to a new domain and learn a lot about robotics.
The experience reinforced a few key learnings:
Simple approach over complex ones
While we did not complete the entire course, we were able to complete the first checkpoint and drive down the hallway. In machine learning, I am often reminded of the KISS principle: Keep it simple, stupid. It's easy to get caught up in the latest research and try to apply it to your problem. However, it's important to remember that the simplest solution is often the best one. By keeping it simple, we were able to get a working solution in a short amount of time.
The importance of data collection
Data collection is often the most time-consuming part of any machine learning project. It's important to think about how you can collect data efficiently and effectively. In our case, we were able to collect a large amount of data quickly by carrying the robot around the office. This allowed us to collect a large amount of data quickly and get a working solution.
Similarly, our robot began to rapidly degrade when sampling data out of distribution (the second hallway). This is a common problem in machine learning, and it's important to think about how you can collect data that is representative of your problem.
The importance of a good team
I was fortunate to have a great team to work with. We were able to work well together and divide and conquer the problem. We were able to get a working solution in a short amount of time, which would not have been possible without a good team.